
Composting turns organic waste into valuable soil food. However, South African gardens face unique challenges that need region-specific knowledge. For instance, the water-scarce Western Cape differs vastly from humid KwaZulu-Natal. Similarly, sandy coastal soils require different approaches than heavy Highveld clay.
This guide brings together proven composting methods, municipal support programs, and practical solutions for SA conditions. Whether you’re composting in a Cape Town courtyard during water restrictions or managing a large Gauteng garden, you’ll find actionable guidance here.
Understanding Composting in the South African Context
Why South African Gardens Need Compost
South African soils present big challenges. Coastal regions struggle with nutrient-poor sand. Meanwhile, inland clay soils compact easily and drain poorly. Additionally, Highveld soils face erosion from summer storms. Across all regions, synthetic fertilisers provide quick fixes but damage soil structure over time.
Fortunately, compost addresses these issues at their root. First, it improves water retention in sandy soils – critical during Western Cape droughts. Second, it loosens clay soils and improves drainage in summer-rainfall regions. Third, it builds microbial life that drives long-term fertility. As a result, plants access nutrients more efficiently.
The environmental case is equally strong. South African households create enormous organic waste volumes. This includes kitchen scraps, garden clippings, and paper products. In fact, the Western Cape aims to divert 50% of compostable waste from landfills by 2027. Furthermore, Cape Town, George, and Mossel Bay now support home composting with free bins and education.
Compost improves soil structure, water retention, and long-term fertility — factors that also matter when deciding whether to start a garden from scratch or upgrade a landscape.
How Composting Actually Works
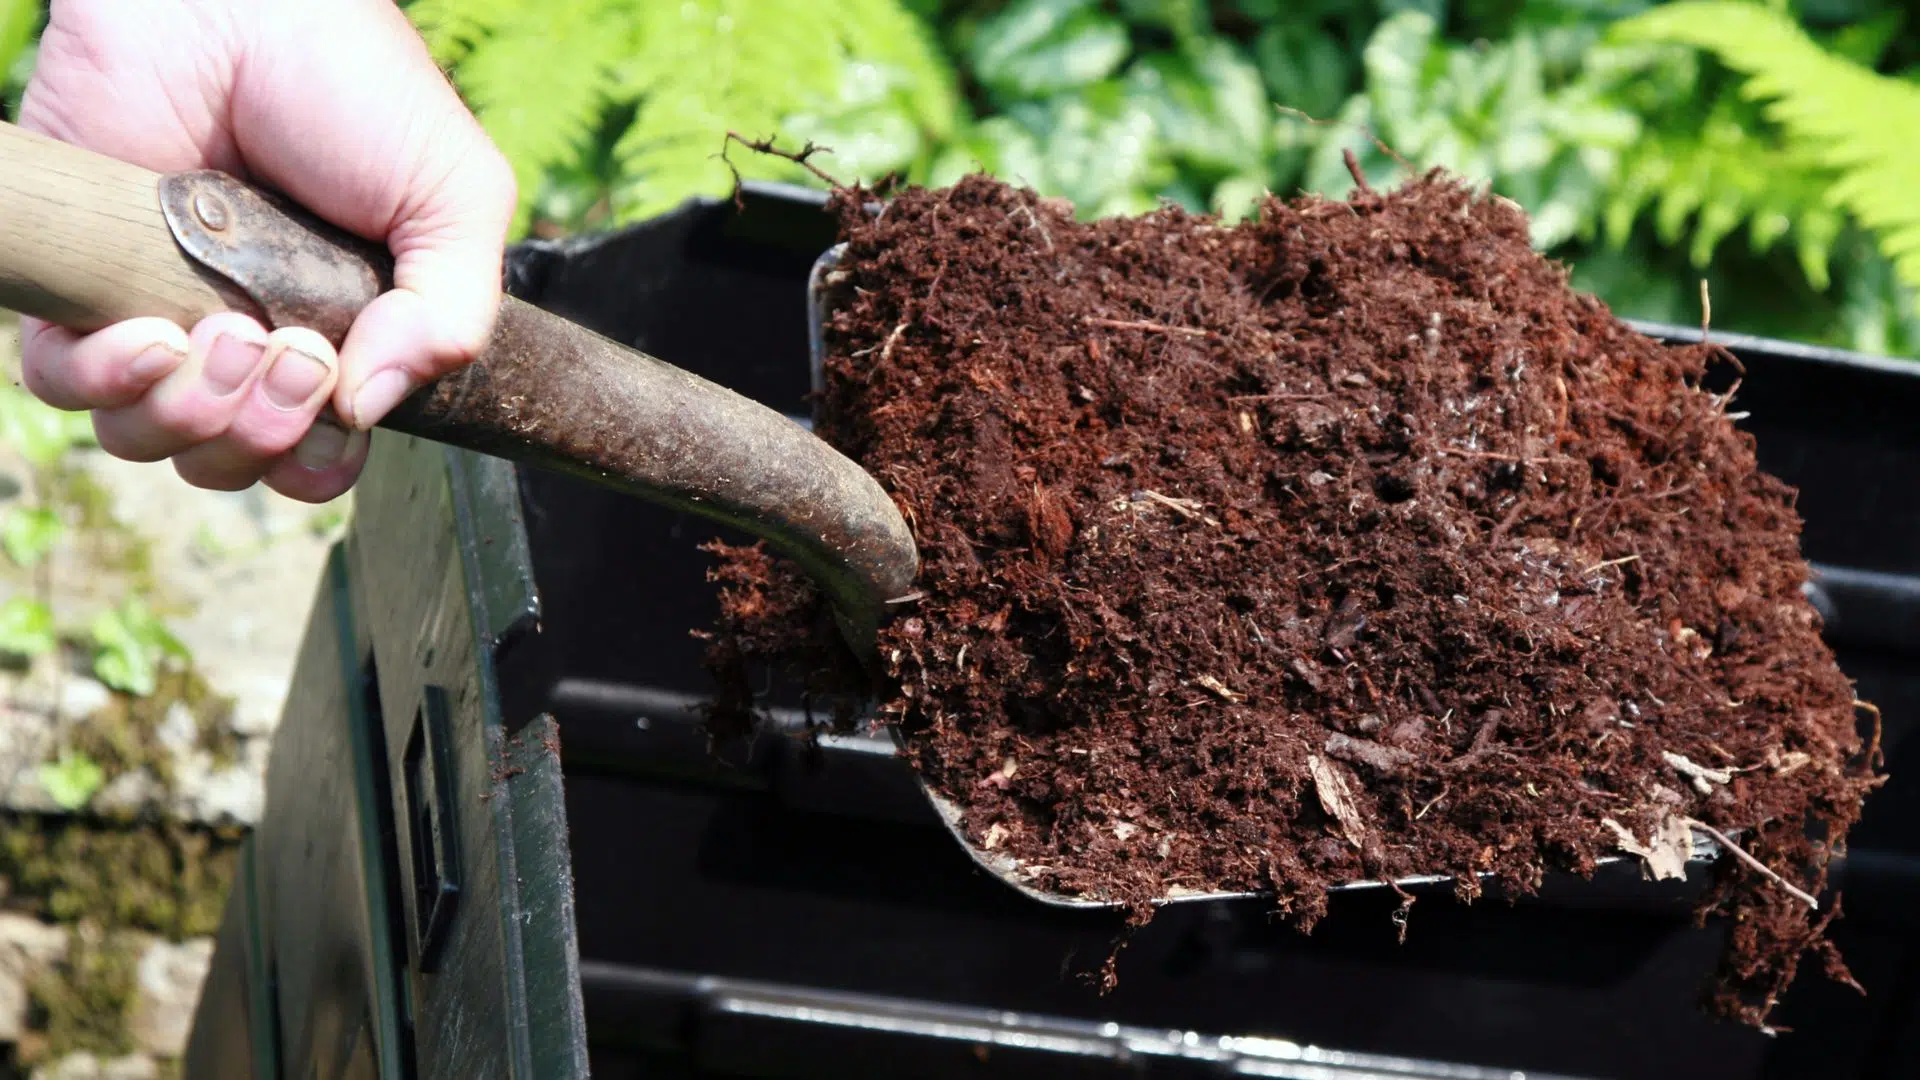
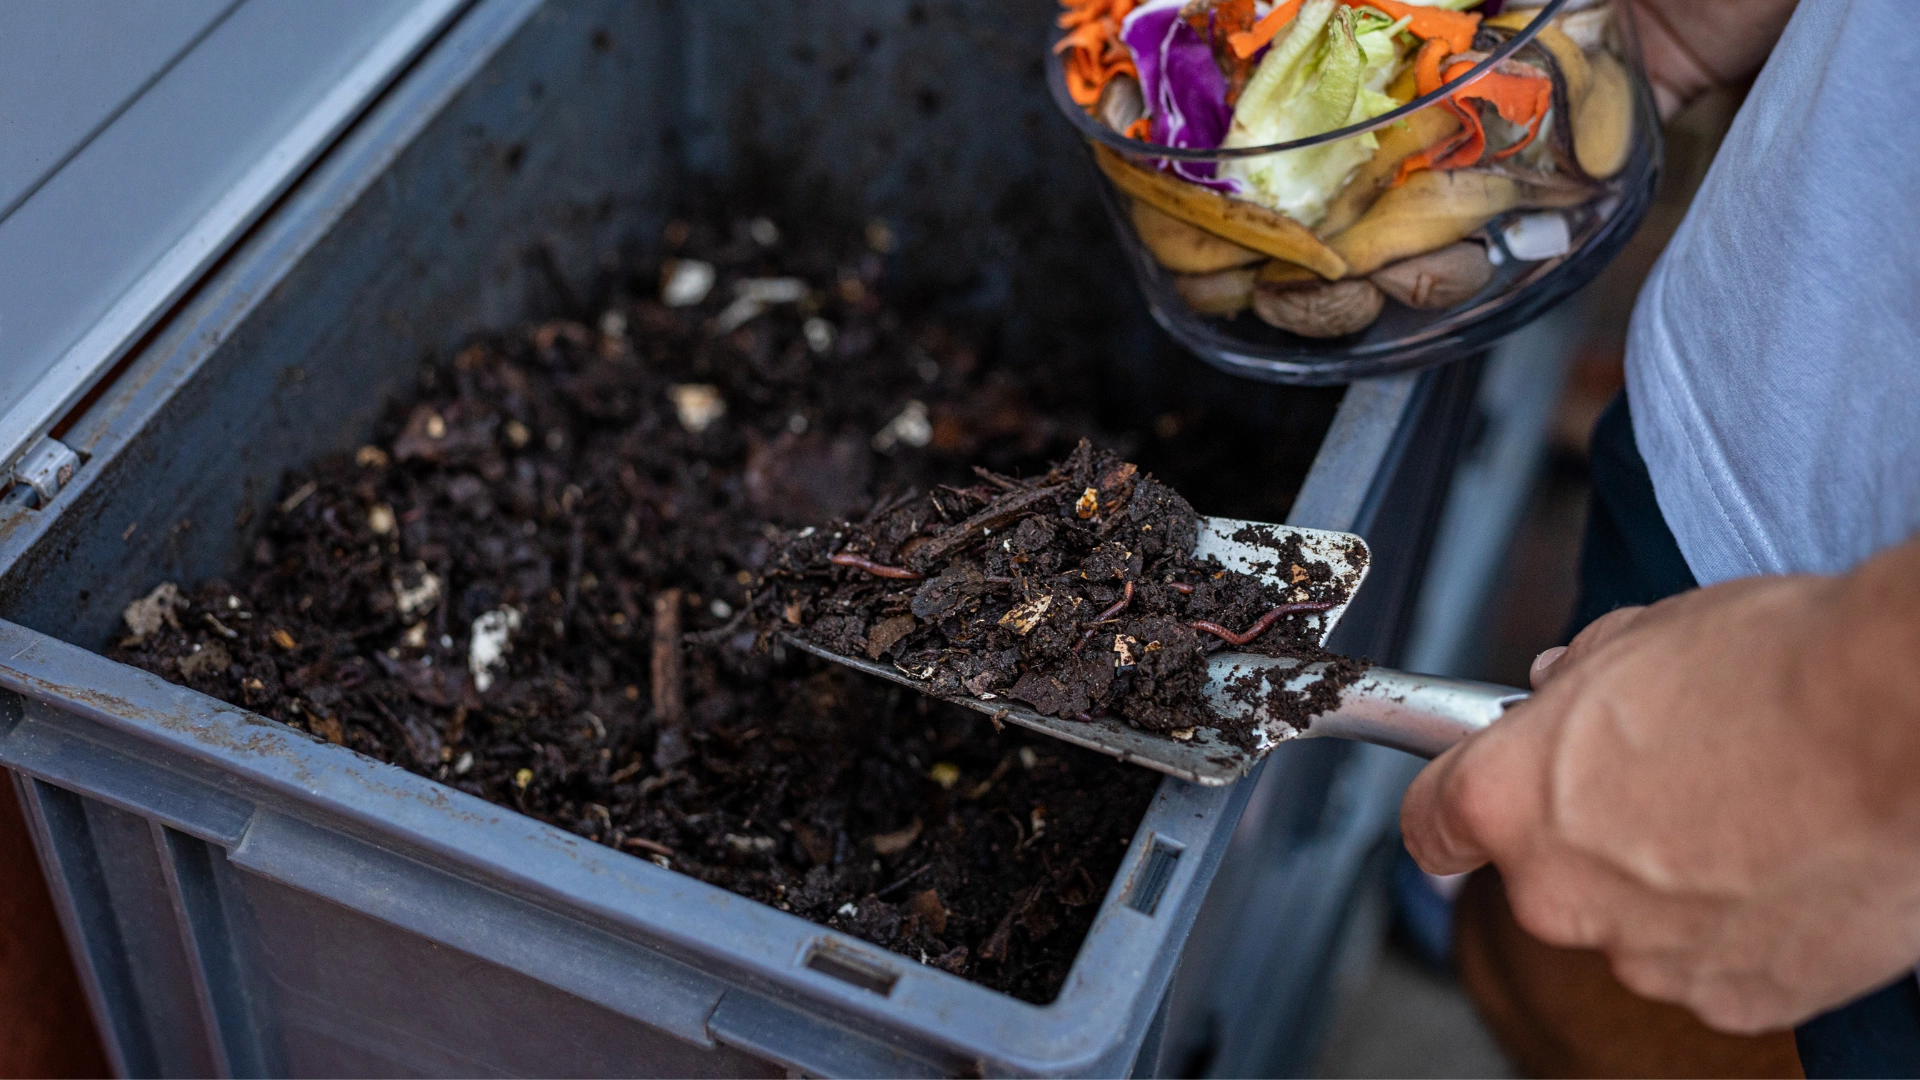
Composting is controlled decomposition. Microorganisms – bacteria, fungi, insects, and worms – break down organic materials. They create humus, a stable substance that improves soil structure and fertility.
Four elements drive successful composting:
- Carbon (“browns”) – These are dry materials like leaves, cardboard, straw, and paper. They provide energy for microbes and create air pockets.
- Nitrogen (“greens”) – These are fresh materials like kitchen scraps, grass clippings, and plant trimmings. They fuel rapid decomposition.
- Moisture – This keeps microorganisms active. Think “wrung-out sponge” – damp but never soggy.
- Oxygen – This ensures aerobic decomposition. Without it, compost turns anaerobic and produces foul smells.
Balance these four elements, and composting becomes reliable. Moreover, it becomes straightforward to manage.
Regional Composting Strategies for South African Climates
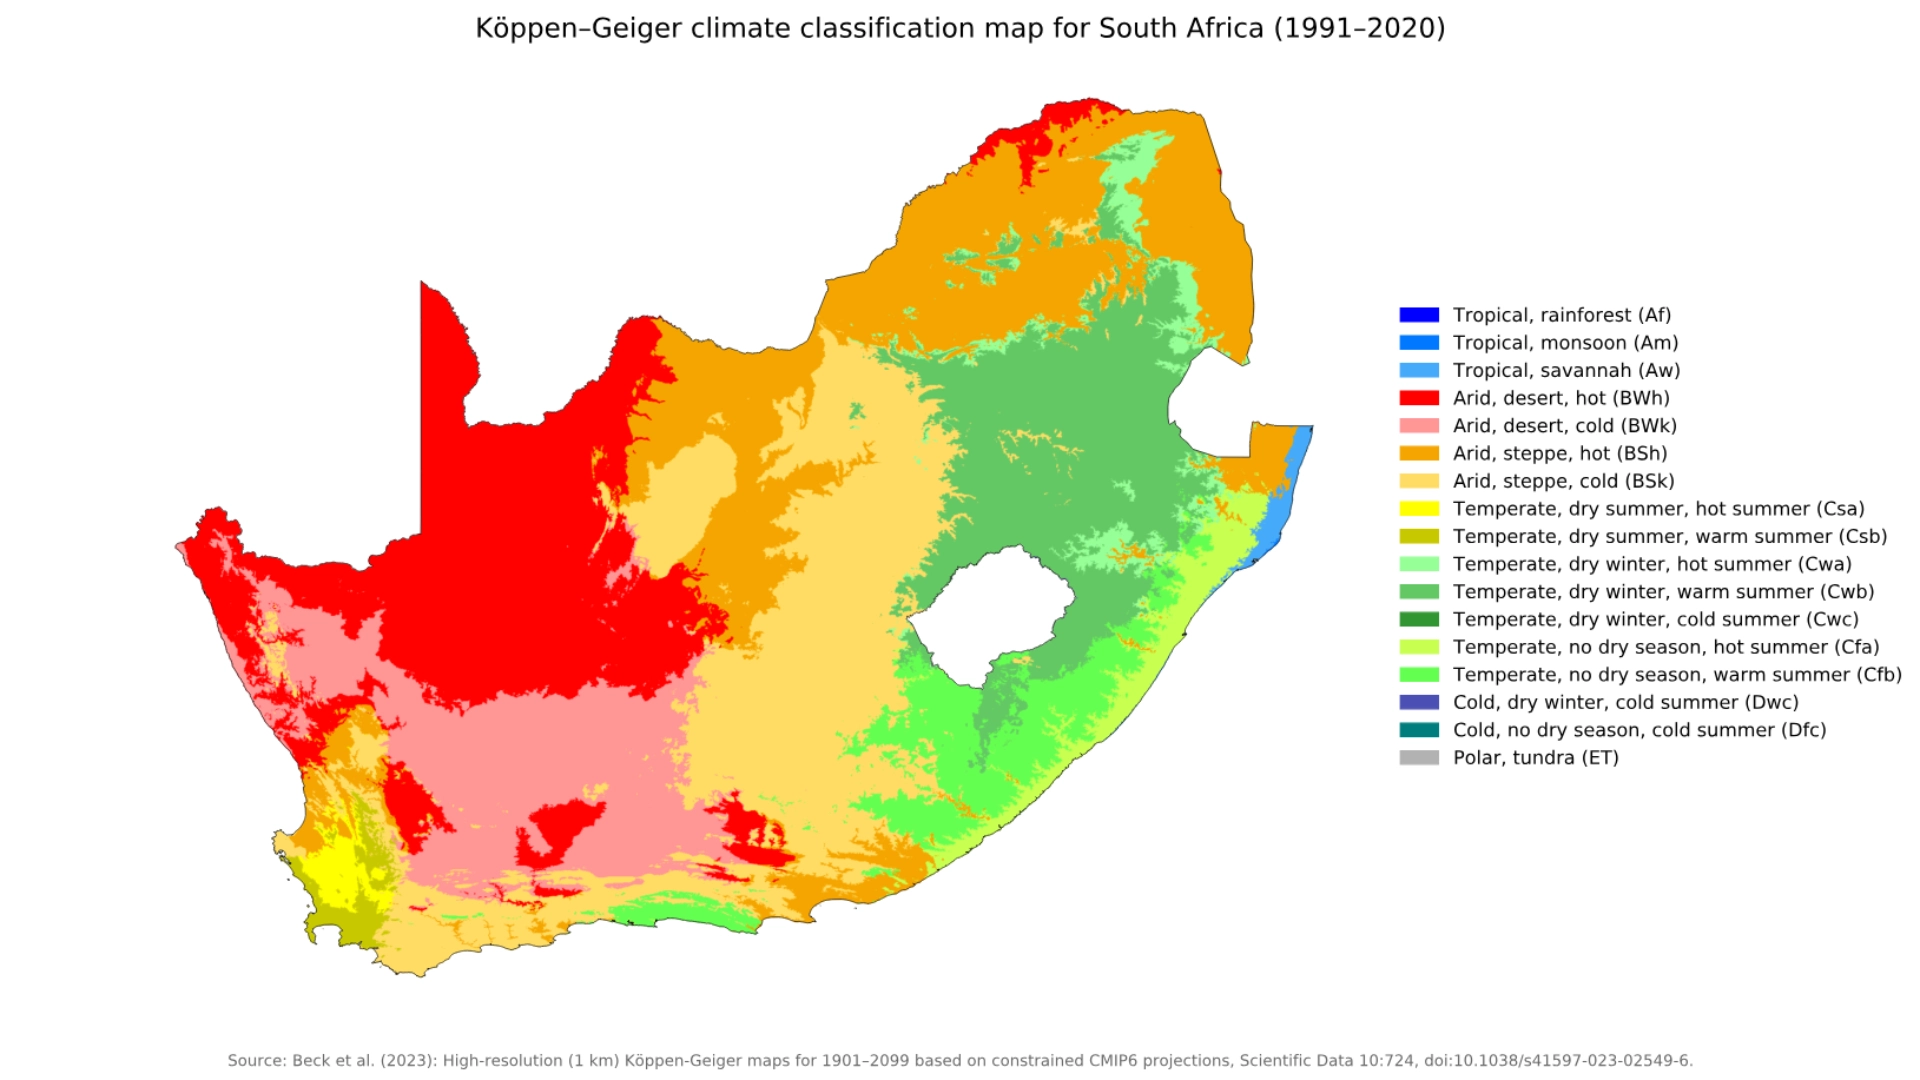
Western Cape (Mediterranean Climate)
Climate: Wet, mild winters (May-September). Hot, dry summers (October-April). Strong south-easterly winds. Water restrictions common.
Composting challenges:
- Summer: Piles dry out rapidly, especially in the wind
- Winter: Excessive rain can waterlog open heaps
- Water scarcity limits moisture management
- Indigenous fynbos gardens need lean, low-nutrient approaches
Regional solutions:
First, cover compost heaps with shade cloth or sheeting. This reduces evaporation and prevents waterlogging. Second, position bins in partial shade, protected from south-easter winds. Third, collect greywater from washing vegetables or bathing. Use this for moistening compost during restrictions.
Additionally, use closed bins to retain moisture and prevent wind drying. For fynbos beds, add compost very sparingly – these plants evolved for nutrient-poor soils. Finally, time major compost building for autumn when temperatures are moderate.
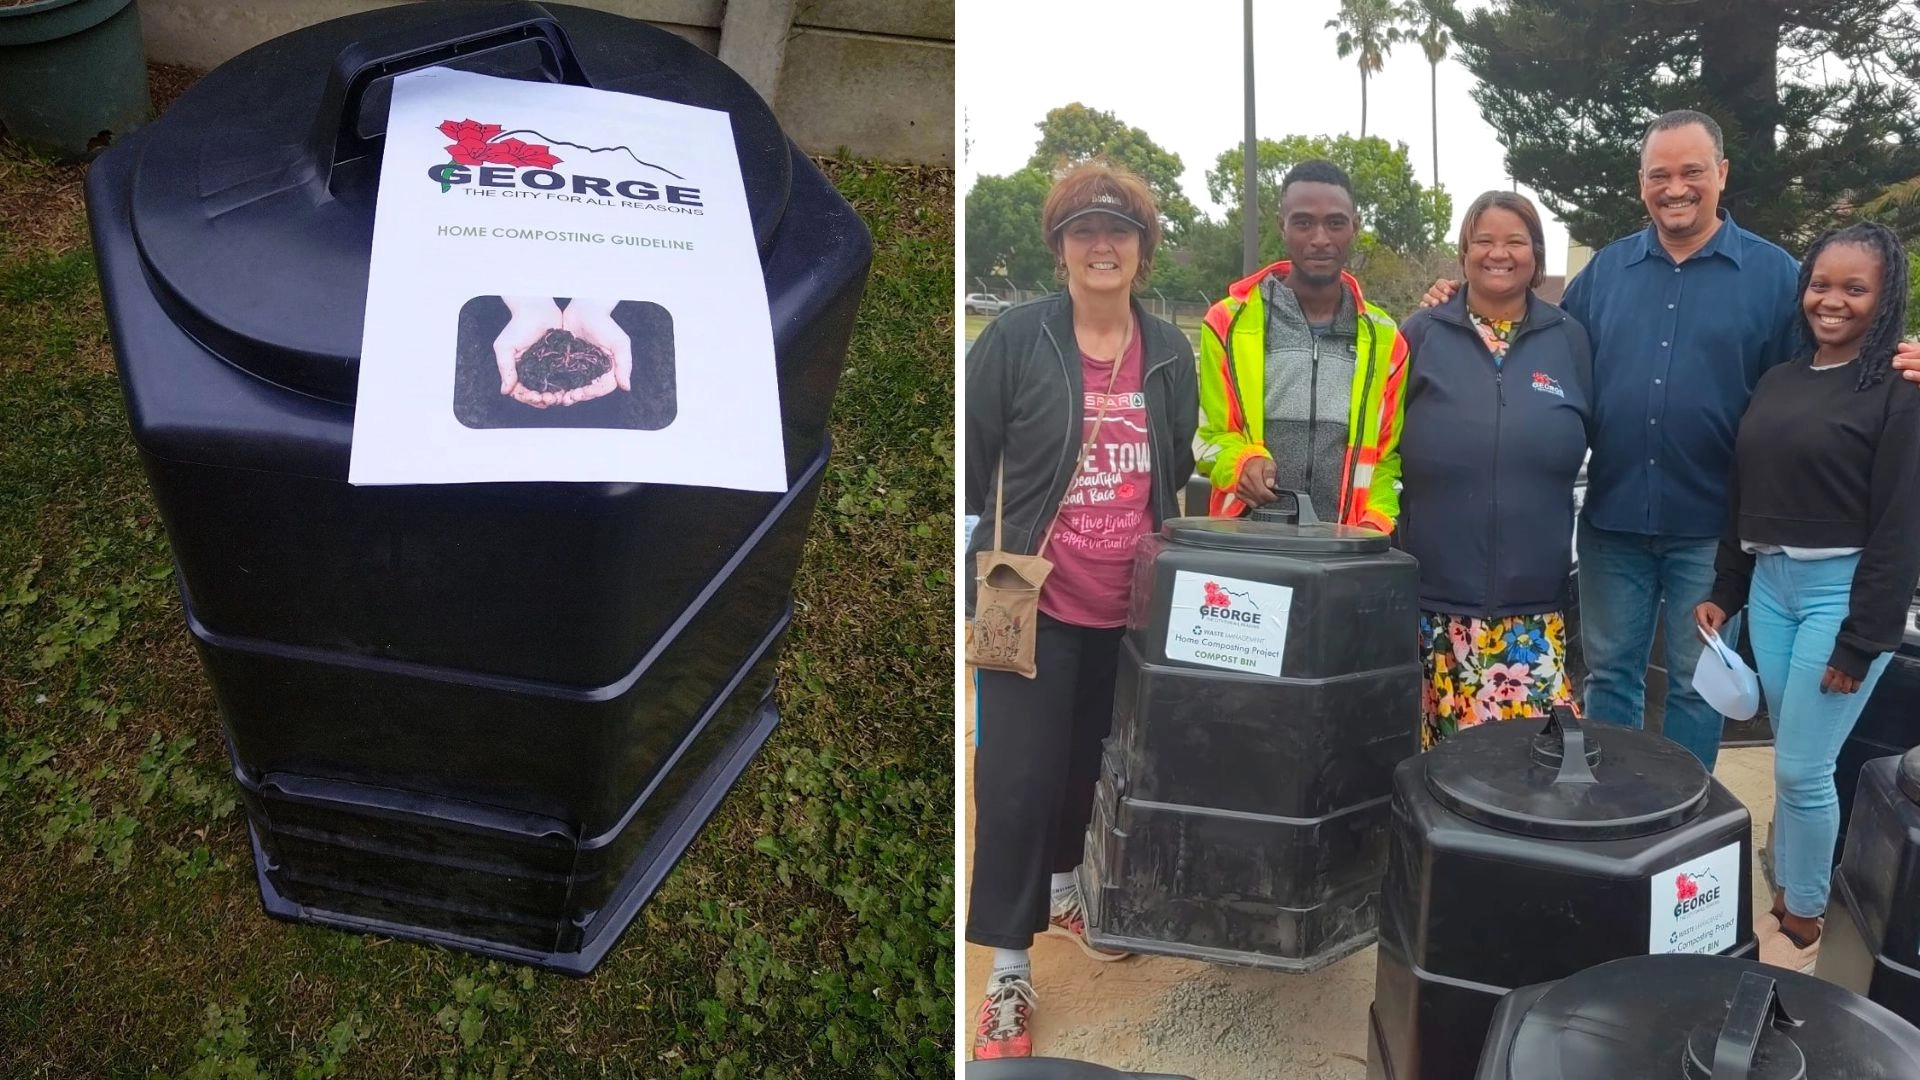
Municipal support: Cape Town offers free composting bins to residents as part of waste diversion efforts. Meanwhile, George Municipality reports over 600 residents are actively composting. Mossel Bay’s pilot project successfully diverted 10.4 tons of organic waste from landfills.
Gauteng (Summer-Rainfall Highveld)
Climate: Summer thunderstorms (October-March). Dry, cold winters with frost. Intense UV radiation. Afternoon hail is possible.
Composting challenges:
- Summer: Heavy rains can waterlog open heaps
- Winter: Decomposition slows dramatically in cold, dry conditions
- Hail and storms can damage unprotected bins
- Clay-heavy soils need significant organic matter
Regional solutions:
First, ensure excellent drainage. Raise bins slightly or create drainage channels. Next, add extra browns during summer rainfall to prevent waterlogging. Also, cover heaps during heavy summer storms to prevent nutrient loss.
In winter, insulate bins with straw bales or cardboard. This maintains biological activity. Furthermore, build larger compost piles (minimum 1m³) to retain heat during winter. Position bins to receive winter sun for warmth. Finally, mix finished compost deeply into clay soils – 10-15cm minimum – to improve structure.
[IMAGE SUGGESTION: Compost bin with straw bale insulation in winter. Alt text: “Insulated compost bin in Gauteng winter with straw bales”]
KwaZulu-Natal (Subtropical Coastal)
Climate: Warm, humid year-round. Summer rainfall. High temperatures. Occasional coastal winds.
Composting challenges:
- High humidity encourages rapid decomposition, but also pest activity
- Consistent warmth means year-round composting and maintenance
- Heavy summer rains can compact and waterlog heaps
- Rats and other pests thrive in warm, humid conditions
Regional solutions:
Turn compost frequently. Decomposition happens fast in heat and humidity. Use secure, enclosed bins to prevent pest access. Bury kitchen scraps deeply within the heap rather than leaving them exposed.
Additionally, add wire mesh at the base of bins. This prevents rat burrowing. Ensure adequate browns to prevent slimy, matted layers common in humid conditions. Position bins in partial shade because full sun overheats compost. Finally, monitor moisture carefully. Natural humidity may provide sufficient moisture without watering.
Eastern Cape (Varied Climate)
Climate: Ranges from coastal subtropical to inland semi-arid. Summer-rainfall regions and year-round rainfall regions. Temperature extremes.
Composting challenges:
- Coastal areas: humidity, pests, rapid decomposition
- Inland areas: drought-prone, temperature extremes, wind
- Variable rainfall makes consistent moisture management difficult
Regional solutions:
Coastal gardeners should follow KZN strategies. Use enclosed bins, frequent turning, and pest prevention. In contrast, inland gardeners should follow moisture conservation strategies. Use covered heaps, mulch layers, and shade.
Importantly, collect rainwater during wet periods for use during dry spells. Choose composting methods matching your specific microclimate conditions.
Composting Methods: Choosing What Works for Your Situation
South African gardeners successfully use multiple composting approaches. Choose based on available space, time commitment, and materials generated.

Hot Composting (Active Method)
How it works: Build a large pile (minimum 1m × 1m × 1m) with balanced materials. The pile’s centre heats to 55-70°C through microbial activity. Consequently, this kills weed seeds and pathogens.
Best for:
- Gauteng winter composting (heat retention)
- Gardens producing large volumes of material
- Gardeners wanting finished compost in 6-8 weeks
- Situations requiring weed seed sterilisation
Requirements:
- Sufficient greens and browns
- Regular turning (every 3-5 days)
- Consistent moisture monitoring
- Larger space
Regional note: This works brilliantly in Gauteng summer when materials are abundant. However, it’s challenging in the Western Cape summer without reliable water for moisture management.
Cold Composting (Passive Method)
How it works: Add materials gradually to a bin or heap. Decomposition occurs slowly at ambient temperature over 6-12 months.
Best for:
- Smaller gardens with limited space
- Households generating modest organic waste
- Low-maintenance approaches
- Western Cape water restrictions (requires less moisture management)
Requirements:
- Basic containment structure
- Occasional turning (monthly or less)
- Patience
Regional note: This is ideal for the Western Cape, where water conservation is critical. It works year-round in KZN’s consistently warm conditions. However, it slows significantly in the Gauteng winter.
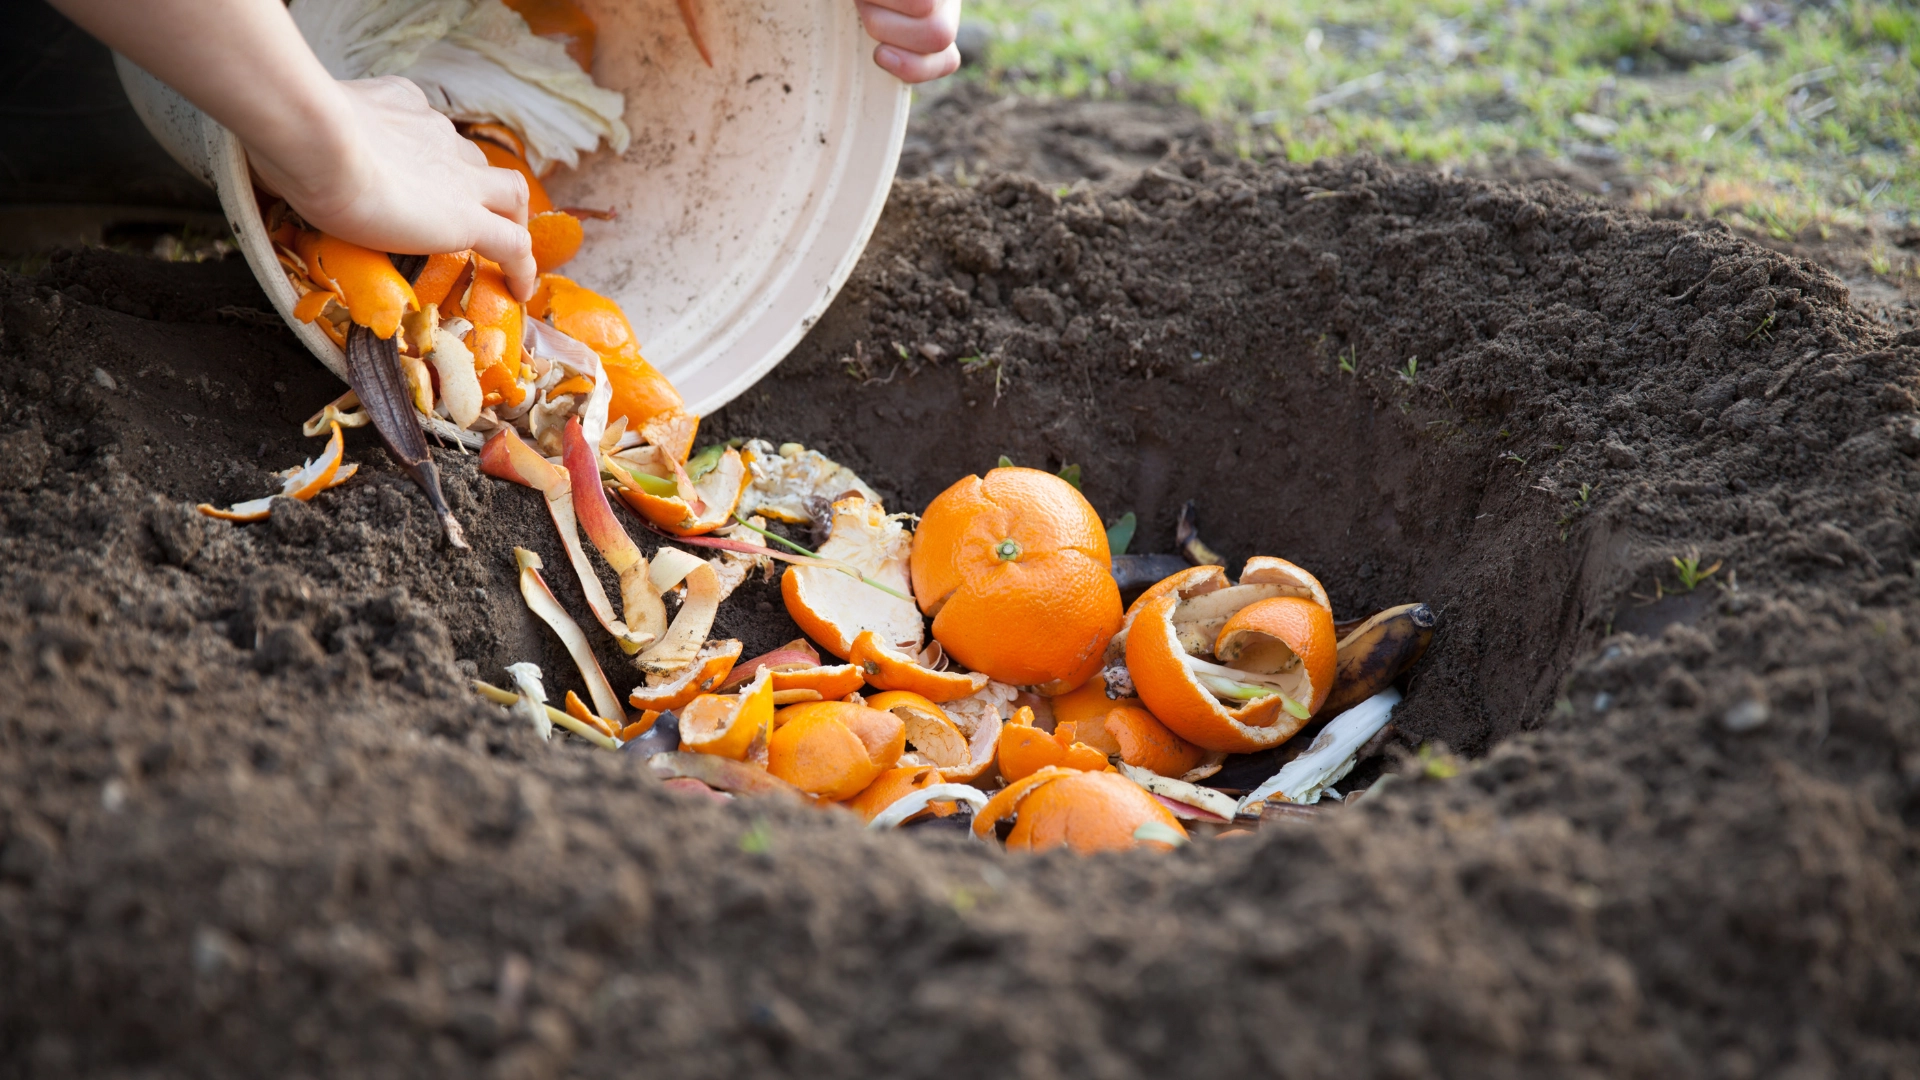
Trench Composting
How it works: Dig shallow trenches (20-30cm deep). Fill with organic waste. Cover with soil. Material decomposes underground, directly enriching soil.
Best for:
- Vegetable gardens between seasonal plantings
- Sandy coastal soils needing organic matter
- Discreet composting in small spaces
- Areas where rats are problematic (buried waste is inaccessible)
Requirements:
- Diggable soil (not heavy clay)
- Rotation system (dig new trenches as old ones fill)
Regional note: This is excellent for Western Cape sandy soils and vegetable gardens. However, it’s less suitable for Gauteng clay soils without significant soil preparation first.
Vermicomposting (Worm Farming)
How it works: Red wiggler worms consume organic waste. They produce worm castings (extremely nutrient-rich) and worm tea (liquid fertiliser).
Best for:
- Small spaces, apartments, townhouses
- Premium compost for pots, herbs, and vegetables
- Households with consistent kitchen waste
- Education opportunities for children
Requirements:
- Worm bin (purchased or DIY)
- Red wiggler worms (Eisenia fetida)
- Careful moisture and temperature management
- Suitable food (no citrus, onions, meat, dairy in large quantities)
Regional notes:
- Western Cape: Protect from summer heat and winter cold. Ideal for small spaces during water restrictions.
- Gauteng: Insulate bins in winter, shade in summer.
- KZN: Shade essential – worms die above 30°C. However, excellent year-round production is possible.
Sheet Composting (Lasagne Method)
How it works: Layer organic materials directly on garden beds. Materials decompose in place, building topsoil.
Best for:
- Preparing new beds
- Restoring poor or compacted soil
- End-of-season garden cleanup
- No-till gardening approaches
Requirements:
- Adequate materials for thick layers
- Time (typically 3-6 months before planting)
Regional note: This is excellent across all regions. It’s particularly effective for Western Cape sandy soils and Gauteng clay. Both benefit from direct organic matter incorporation.
Essential Composting Setup and Maintenance
Choosing the Right Container
- Open heaps/three-bay systems: Constructed from pallets, wood, wire mesh, or bricks. Maximum airflow. Easy to turn. Suit larger gardens producing substantial material.
- Closed plastic bins: Neat, contained, rodent-resistant. Excellent for suburban gardens, windy coastal areas, and small spaces. Retains heat and moisture.
- Flow bins: Repurposed IBC containers or bulk storage bins. Cut the top open, drill drainage holes in the base. Very large capacity. Ideal for serious composters with big gardens.
- Tumblers: Rotating drums make turning easy. Small batch composting. Warning: These dry out quickly in SA conditions. They require frequent watering, especially in the Western Cape summer and Gauteng winter.
- DIY worm farms: Stacked plastic containers or wooden boxes. Must maintain stable temperature and moisture.
Optimal Bin Positioning
All regions need:
- Partial shade (prevents rapid drying and overheating)
- Good drainage (raise slightly if in a heavy-rainfall region)
- Easy access from the kitchen and the garden
- Protection from the strongest prevailing winds
Regional specifics:
- Western Cape: Maximum shade and wind protection. Consider a north-facing position for winter warmth.
- Gauteng: Winter sun exposure beneficial. However, summer shade is essential.
- KZN: Shade critical year-round. Position away from downspouts to avoid flooding.
Building a Balanced Compost Pile

The 2:1 ratio: Aim for roughly twice as much brown material as green. This isn’t rigid because composting is forgiving. However, it creates optimal conditions.
Greens (nitrogen sources):
- Fresh grass clippings
- Kitchen vegetable/fruit scraps
- Coffee grounds and tea leaves
- Fresh garden prunings and soft stems
- Green leaves
Browns (carbon sources):
- Dry leaves (abundant in autumn)
- Shredded cardboard and paper
- Straw and hay
- Sawdust (small amounts – it’s very high-carbon)
- Dry twigs and woody prunings
Materials to avoid:
- Meat, fish, dairy, oils (attract pests, cause smells)
- Dog and cat faeces (potential pathogens)
- Diseased plant material (diseases may survive)
- Weeds with seeds (unless hot composting)
- Glossy/coated paper (chemical inks)
- Treated wood sawdust (preservatives are toxic)
Layering technique:
Start with coarse browns like small branches or rough straw. This provides drainage and airflow. Then alternate thin layers – 5-10cm of greens, followed by 5-10cm of browns. Importantly, thin layers decompose faster and more evenly than thick layers. This prevents matting and maintains airflow.
Moisture management:
The “wrung-out sponge” test is universal. Squeeze a handful of compost:
- Water runs out freely = too wet (add browns, turn pile)
- Crumbles apart, feels dry = too dry (add water, greens)
- Forms a ball, slight moisture on palm = perfect
Regional moisture tips:
- Western Cape summer: Check moisture every 2-3 days. Consider drip irrigation if available.
- Gauteng summer: Monitor after heavy rains. Often needs drainage assistance.
- KZN: Natural humidity is often sufficient. However, monitor to prevent over-saturation.
Aeration strategies:
Oxygen is essential. Compact, airless compost turns anaerobic (foul-smelling and slimy).
- Hot compost: Turn every 3-5 days during the active phase
- Cold compost: Turn monthly or when the pile cools
- Worm bins: Gently fork top layers weekly
- All methods: Push stick into pile occasionally to create air channels
Signs needing more air include a sour smell, a slimy texture, and very slow decomposition.
Accelerating Decomposition
Add compost activators:
- Handful of finished compost (introduces active microbes)
- Animal manure – chicken, horse, cow (nitrogen boost plus microbes)
- Commercial activators (Bokashi, EM products)
- Blood and bone meal
- Urine (diluted 1:10 with water – strong nitrogen source)
Increase surface area:
Chop or shred large materials before adding. Smaller pieces equal faster decomposition. Western Cape tip: Autumn leaf fall is abundant. Run over leaves with a lawn mower before composting.
Maintain optimal temperature:
Hot compost sweet spot is 55-65°C. Higher kills beneficial organisms. Lower slows decomposition.
- Gauteng winter: Insulate bins with straw bales
- All regions: Larger piles (1m³ minimum) retain heat better
Troubleshooting Common South African Composting Problems
Problem: Compost Smells Bad (Ammonia or Sour Smell)
Causes:
- Too much nitrogen (greens)
- Too wet (anaerobic conditions)
- Insufficient oxygen (compacted pile)
Solutions:
First, add browns immediately. Use shredded cardboard, dry leaves, or straw. Next, turn the pile thoroughly to introduce oxygen. If extremely wet, remove material, add browns, and remix. KZN note: This is very common in humid conditions. Always keep extra browns available.
Problem: Pile Isn’t Heating or Decomposing
Causes:
- Insufficient nitrogen
- Too dry
- Too small (can’t generate heat)
- Insufficient oxygen
- Too much carbon
Solutions:
Add greens such as kitchen scraps, fresh grass clippings, or manure. Add moisture by watering lightly while turning. Build a bigger pile (minimum 1m³ for hot composting). Turn to introduce oxygen. Check brown:green ratio and adjust toward greens.
Regional note: In Gauteng winter, decomposition naturally slows. Don’t expect hot compost. Instead, switch to a passive method.
Problem: Pests (Flies, Maggots, Rats)
Causes:
- Exposed food scraps
- Meat/dairy in pile
- Easy access points
Solutions for flies/maggots:
First, bury kitchen scraps 20cm deep in the centre of the pile. Second, cover fresh additions with browns or soil. Third, ensure the bin has a tight-fitting lid. Finally, add lime or wood ash (thin layer) to affected areas.
Solutions for rats:
Never add meat, dairy, cooked food, or oils. Use enclosed bins only. Install wire mesh (10mm gauge) at the base of bins. Bury kitchen scraps deeply. Avoid adding citrus peels in winter because rats love these when other food is scarce. KZN and coastal note: Rats are a year-round challenge. Therefore, prevention is essential.
Problem: Compost Too Dry, Not Breaking Down
Causes:
- Insufficient moisture
- Too much sun exposure
- Western Cape summer conditions
- Gauteng winter conditions
Solutions:
Water lightly while turning. Cover pile with hessian, shade cloth, or cardboard. Relocate the bin to a shadier position. Add more greens because these contain moisture.
Regional tips:
- Western Cape: Use greywater where possible. Consider installing a simple rainwater catchment, even if just for compost.
- Gauteng winter: This is expected. Decomposition will resume in spring.
Problem: Compost Too Wet, Slimy, or Matted
Causes:
- Too much nitrogen
- Excessive rainfall
- Poor drainage
- Insufficient browns
- Gauteng summer thunderstorms
- KZN humidity
Solutions:
Add browns generously because this is the immediate fix. Turn pile to introduce air and break up matted layers. Improve drainage by raising the bin slightly or adding a gravel base. Cover the pile during heavy rain. Ensure adequate browns are always available.
Problem: Pile Contains Undecomposed Woody Material
Causes:
- The woody material is too large
- Insufficient nitrogen to break down high-carbon wood
- Inadequate moisture
Solutions:
Remove large pieces, chop smaller, and return to the pile. Add extra greens to balance high carbon. Be patient because woody materials take 12-18 months. For future reference, run woody prunings through a chipper or garden shredder. Alternatively, keep a separate slow-decomposition pile.
South African Municipal Composting Support Programs
Multiple municipalities actively support home composting. They provide free bins, education programs, and waste diversion initiatives.
Cape Town Metropolitan Municipality
Cape Town’s home composting programme provides free compost bins to residents. This forms part of their waste management strategy. The goal is to divert organic waste from landfills, where it produces methane and leachate contamination.
How to participate:
- Register online through the City of Cape Town website
- Attend a brief orientation workshop
- Receive a free 220-litre green bin
- Access ongoing support and resources
Why they’re doing this: Western Cape provincial policy mandates 50% organic waste diversion from landfills by 2027. A complete ban takes effect by 2030.
George Municipality
George’s home composting project has enrolled over 600 residents. The program provides bins and education. It reports significant waste diversion success.
Program features:
- Free composting bins for residents
- Workshops and ongoing support
- Community success stories highlighting benefits
Mossel Bay Municipality
Mossel Bay’s year-long pilot project demonstrated a clear impact:
- 34 participating households
- 10.4 tons of organic waste diverted from landfill
- Average 25.6kg per household per month composted
- A combination of bins, worm farms, and heaps used
The municipality has since expanded the program. They’ve procured additional bins and worm farms. Furthermore, they’re implementing school composting education programs at five local schools.
Garden Route District Municipality
The GRDM coordinates composting initiatives across the region:
- Hessequa: 22 households in Gouritzmond diverted 3.5 tons over one year. That’s 13.28kg per household monthly.
- Knysna: Sedgefield pilot launched with 24 households. They’re averaging 40kg monthly diversion.
- Future rollout: Bitou and Oudtshoorn municipalities will be implementing programs next.
Gauteng Municipalities
While fewer publicised programs exist than Western Cape, several Gauteng municipalities offer:
- Educational workshops through environmental departments
- Occasional bin distributions
- School education programs
- Contact your local municipality’s environmental services department for current offerings
How to Access These Programs
First, visit your municipality’s website. Second, contact environmental services or the waste management department. Third, ask about home composting support, free bins, and workshops. Finally, join local gardening groups because members often share program information.
Using Finished Compost in South African Gardens
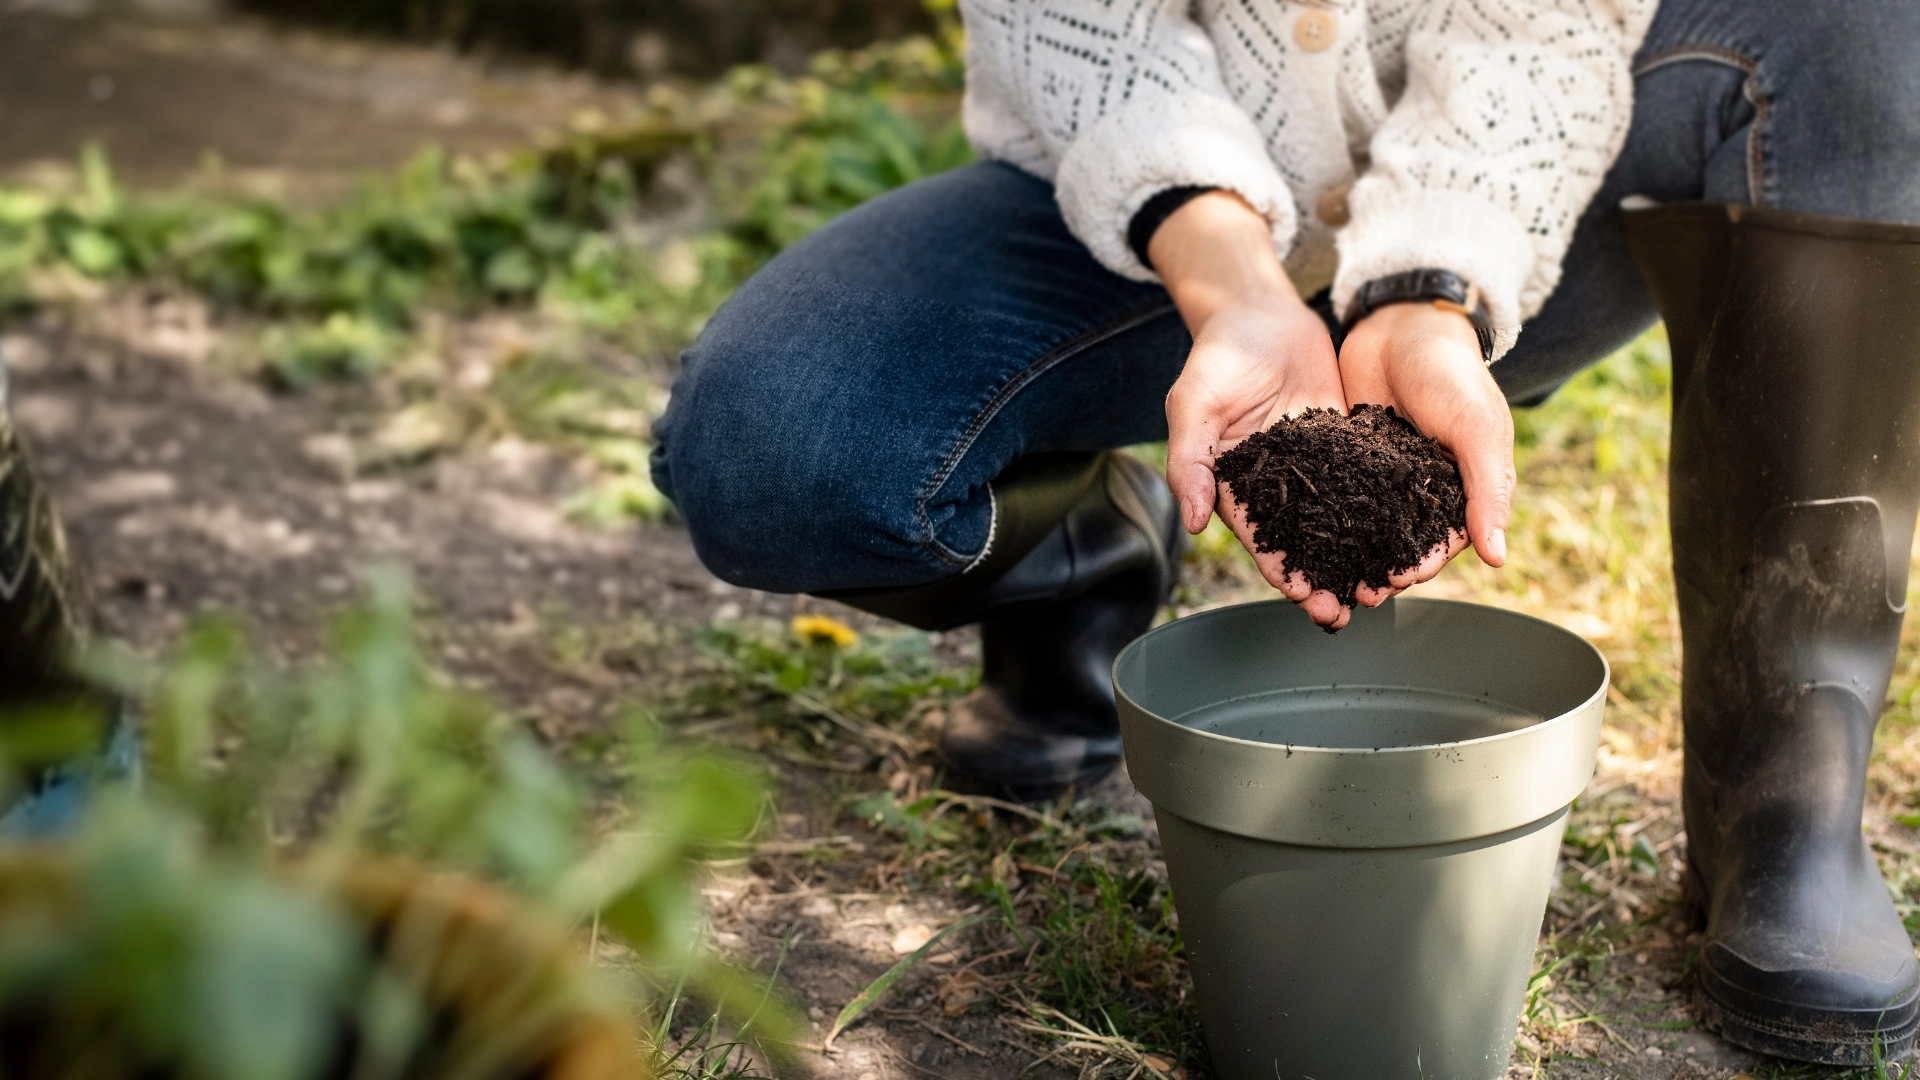
When Is Compost Ready?
Finished compost is:
- Dark brown to black
- Crumbly, not clumpy
- Earthy-smelling (pleasant, not foul)
- Original materials unrecognizable
- Cool temperature (biological activity complete)
If the material is still warm, fibrous, or you can identify ingredients, let it mature longer. Immature compost can temporarily “rob” nitrogen from the soil as decomposition completes.
Application Guidelines by Garden Type
- Vegetable gardens: Mix 5-10cm of compost into the top 15cm of soil before planting. Vegetables are heavy feeders. Therefore, they benefit enormously from rich compost.
- Regional variations:
- Gauteng clay soils: Work the compost in deeply (15-20cm) to break up the density.
- All regions: Top-dress growing vegetables with a thin compost layer (mulch) mid-season.
- Western Cape sandy soils: Can handle generous compost. This improves water retention dramatically.
- Ornamental beds: Mix 3-5cm into the top 10cm when establishing new beds. Top-dress established beds with 2-3cm annually in spring.
- Indigenous/fynbos gardens (Western Cape primarily): Use compost sparingly or not at all. Fynbos evolved for nutrient-poor conditions. Too much compost encourages inappropriate growth and disease susceptibility. If used, apply a very thin layer (1cm maximum) only around exotic ornamentals, not near indigenous plants.
- Lawn areas: Top-dress very lightly (1-2cm) once yearly in spring. Spread a thin layer and water in thoroughly. Too much creates a spongy, unhealthy lawn surface.
- Potted plants: Never use pure compost in containers because it’s too dense with poor drainage. Instead, mix 1 part compost with 2-3 parts quality potting mix for container growing.
- Trees and shrubs: Apply a 5cm layer around a drip line (not touching the trunk). Compost acts as mulch while slowly feeding roots.
Regional Application Timing
- Western Cape: Apply in autumn (March-May) before winter rains help incorporate. Alternatively, apply early spring (August-September) before the growing season.
- Gauteng: Apply in spring (September-October) before the summer growing season. Avoid winter application because the benefits are minimal when growth is dormant.
- KZN: Year-round application possible. However, avoid peak summer heat when working compost into soil is exhausting. Autumn and spring are ideal.
Advanced Composting Techniques
Creating Compost Tea
- Compost tea extends compost benefits through liquid application. It’s useful for:
- Foliar feeding (spraying leaves)
- Watering seedlings
- Applying to areas where working with solid compost is impractical
- Basic recipe: First, fill a bucket (20L) with water. Use rainwater or dechlorinated water because chlorine kills beneficial microbes. Second, add 2-3 handfuls of finished compost. Third, stir daily for 3-5 days. Fourth, strain through a cloth. Fifth, dilute 1:10 (1 part tea, 10 parts water). Finally, apply within 24 hours because beneficial bacteria die quickly.
- Application: Use a watering can (pressure sprayers kill bacteria). Apply late afternoon to avoid UV damage to microbes.
Worm Tea from Vermicomposting
Worm castings produce extraordinarily rich liquid fertiliser:
First, collect liquid that drains from a worm farm (if the system has drainage). Alternatively, soak worm castings in dechlorinated water for 24 hours. Then dilute 1:10. Apply as above.
Worm tea contains higher concentrations of nutrients and beneficial microbes than regular compost tea.
Bokashi Composting (Pre-composting Method)
Bokashi is a Japanese fermentation technique increasingly popular in SA. It’s useful for:
- Composting meat, dairy, and cooked food
- Small spaces (apartments, townhouses)
- Fast processing (2 weeks)
How it works:
First, layer food scraps in an airtight bucket. Second, sprinkle with Bokashi bran (contains beneficial microbes). Third, press down to remove air. Fourth, seal tightly. Finally, after 2 weeks, bury fermented material in the garden or add to a regular compost bin.
Benefits: Processes all food waste. Produces nutrient-rich liquid. Fast. No smell if done correctly.
Limitations: Fermented material must still be buried or further composted. It’s pre-composting, not finished compost.
Building Hot Compost in Batches
For maximum efficiency, build hot compost all at once rather than gradually:
First, collect materials over weeks. Store browns and greens separately. Second, build an entire pile in a single session: 1m × 1m × 1m minimum. Third, alternate thin layers of browns and greens. Fourth, moisten as you build. Fifth, turn every 3-5 days once heating begins. Finally, it’s finished in 4-8 weeks, depending on conditions.
Regional timing:
- Gauteng summer: Optimal time for hot composting. Abundant materials and warm temperatures.
- Western Cape autumn: Good timing. Moderate temperatures, materials available from autumn cleanup, and sufficient moisture.
Creating a Year-Round Composting System
[IMAGE SUGGESTION: Three-bin composting system diagram. Alt text: “Three-bin composting system showing fresh, active and maturing stages”]
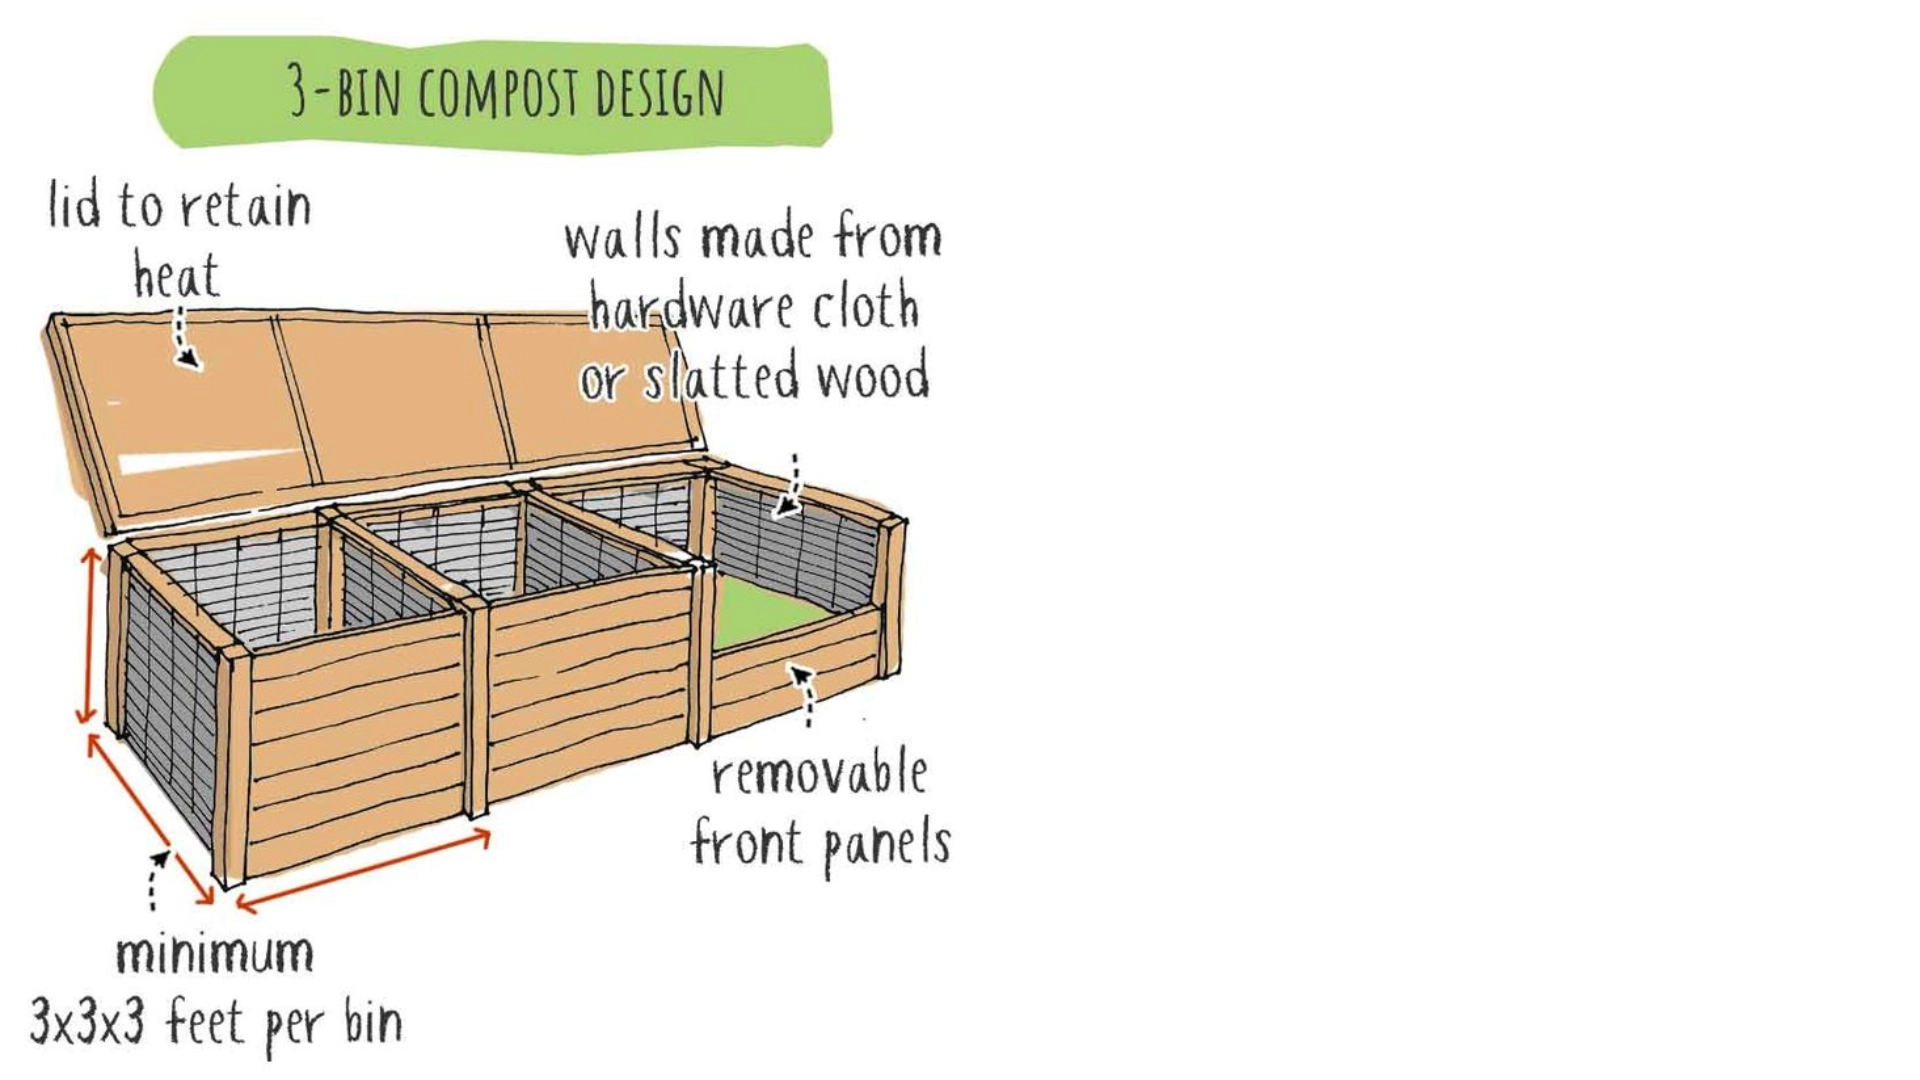
Source: Help Me Compost (https://helpmecompost.com/)
Successful SA composters often run multiple simultaneous systems:
- Two-bin system: Bin 1 is active – currently adding materials. Meanwhile, Bin 2 is maturing – decomposing, not disturbed. When Bin 1 is full, stop adding materials. It becomes the maturing bin. Start filling Bin 2. By the time Bin 2 fills, Bin 1 has finished and can be emptied. This provides a continuous compost supply.
- Three-bin system (ideal for large gardens): Bin 1 is fresh – currently filling. Meanwhile, bin 2 is active – turned regularly, heating. Bin 3 is maturing – finishing, ready soon. Materials progress through stages. Therefore, you always have compost at various stages.
- Combined system: Use a main bin for cold compost for general garden waste. Add a worm farm for kitchen scraps, producing premium castings. Include trench composting by rotating through vegetable beds between seasons. This diversified approach handles all organic waste types efficiently. It produces varied compost products for different garden needs.
Understanding Compost Chemistry (Simplified)
While composting doesn’t require scientific precision, understanding basics helps with troubleshooting:
Carbon:Nitrogen ratio: Ideal is approximately 25-30:1 (carbon to nitrogen). This is where the 2:1 browns to greens guideline comes from. Browns are higher in carbon. Greens are higher in nitrogen.
Too much carbon (browns): Results in slow decomposition and a cool pile. Solution: Add greens.
Too much nitrogen (greens): Results in foul smell, slimy texture, and fly problems. Solution: Add browns.
pH levels: Finished compost typically settles at pH 6-8 (slightly acidic to slightly alkaline). This suits most plants. SA soils vary:
- Western Cape: Often acidic (pH 4-6). Compost helps buffer toward neutral.
- Inland regions: Can be alkaline (pH 7-9). Compost is still beneficial.
No need to test pH in home composting. Balanced materials naturally produce an appropriate pH.
Temperature zones in hot composting:
- 40-50°C: Decomposition begins
- 55-65°C: Optimal (kills pathogens and weed seeds)
- 70°C+: Too hot. Beneficial organisms die. Turn pile and add browns to cool slightly.
Environmental Impact: Why This Matters
Composting at home delivers significant environmental benefits specific to South African conditions:
- Landfill pressure reduction: SA landfill space is limited and expensive. Organic waste comprises 30-40% of household waste. Composting diverts this entirely.
- Methane emission reduction: Organic waste in landfills produces methane (a potent greenhouse gas). In contrast, aerobic composting produces minimal methane.
- Water conservation: Compost-enriched soil retains water better. In the drought-prone Western Cape, this reduces irrigation needs substantially.
- Reduced chemical fertiliser dependency: Manufacturing synthetic fertilisers is energy-intensive and environmentally damaging. Compost is locally produced and renewable.
- Soil erosion prevention: Compost improves soil structure. Consequently, this reduces erosion from heavy Gauteng summer storms and prevents topsoil loss.
- Groundwater protection: Healthy, compost-rich soil filters water naturally. Therefore, it protects groundwater from contamination.
When multiplied across thousands of households, home composting creates a measurable positive environmental impact.
Composting as a Continuous Garden Practice
Successful composting becomes a rhythm, not a task. It’s a natural extension of gardening:
- Daily: Collect kitchen scraps in a small countertop container. At day’s end, add to compost bin. Bury under browns.
- Weekly: Check moisture levels (squeeze test). Turn hot compost piles. Harvest worm castings from vermicomposting. Add garden waste as it accumulates.
- Monthly: Turn cold compost piles. Assess progress – is decomposition proceeding? Add water, greens, or browns as needed. Check for common problems (smell, pests, slow decomposition).
- Seasonally: Major garden cleanups generate significant organic material. This includes autumn leaves, spring pruning, and summer grass clippings. Build hot compost piles with these seasonal surges. Plan bin emptying and compost application around growing seasons.
Regional seasonal rhythms:
Western Cape:
- Autumn: Collect fallen leaves, build compost piles, and apply finished compost before winter rains
- Winter: Minimal maintenance because piles decompose slowly in cool, wet conditions
- Spring: Turn maturing piles and begin new piles with spring growth
- Summer: Monitor moisture constantly, protect from drying, use finished compost for summer planting
Gauteng:
- Spring: Clean winter accumulation and build piles as growth accelerates
- Summer: Peak composting season with abundant materials, active decomposition, frequent turning, manage moisture after thunderstorms
- Autumn: Continue composting as growth slows and apply finished compost
- Winter: Minimal activity because decomposition slows, focus on planning and collecting browns
KZN:
- Year-round composting possible
- Wet season (Oct-Apr): Monitor for excess moisture, ensure good drainage, prevent pest access
- Dry season (May-Sep): Easier maintenance, less moisture management needed
Connecting With the Composting Community
Composting knowledge spreads through the community:
- Join local gardening groups: Most towns have active gardening clubs. Members share composting experiences, materials, and advice.
- Social media: Facebook groups dedicated to SA composting and gardening offer peer support. They provide troubleshooting help and local tips.
- Municipal workshops: Attend when offered. You’ll get free education, networking with other composters, and access to bins and resources.
- Share your success: When your compost-fed vegetables thrive, or your soil improves dramatically, share this with neighbours. Composting adoption grows through visible success.
- School programs: Garden Route and other regions implement school composting. Volunteer if possible because educating youth creates lasting environmental awareness.
Final Perspective: Composting Is Regenerative Gardening
- Composting closes the loop in your garden. Instead of: Importing fertilisers → Creating waste → Sending waste away → Depleting soil
- You create a regenerative cycle: Growing plants → Harvesting → Returning organic matter → Enriching soil → Healthier plants
This is sustainable gardening at its simplest and most effective.
South African gardens, with their challenging soils and climates, benefit enormously from this closed-loop approach. Compost provides exactly what our diverse soils need: structure, fertility, water retention, and microbial life.
Whether you’re composting in a Dana Bay courtyard, a Johannesburg suburban garden, or a Durban tropical landscape, the principles remain constant. Balance browns and greens. Manage moisture. Provide oxygen. Allow microbes to work.
The result? Rich, dark, living compost – South Africa’s true garden gold. It builds healthy soil, supports thriving plants, and contributes to environmental sustainability.
Start small with a single bin, kitchen scraps and autumn leaves. Before long, you’ll wonder how you ever gardened without it.
For more information about composting programs in your area, contact your municipal environmental services department. To learn about getting started with home composting, visit Contours’ guide to home composting.